
Create Your Account
Jonot setup has two phases:
- Phase A — Sign up at join.jonot.io. Create your account, name your organisation, and choose a plan in the signup wizard.
- Phase B — Set up your venue in admin.jonot.io. After checkout, open Admin from the confirmation screen. In Admin, add your first location, create queues, and pair devices.
This page covers Phase A. Head to join.jonot.io to begin.
Step 1 — Create your account
Section titled “Step 1 — Create your account”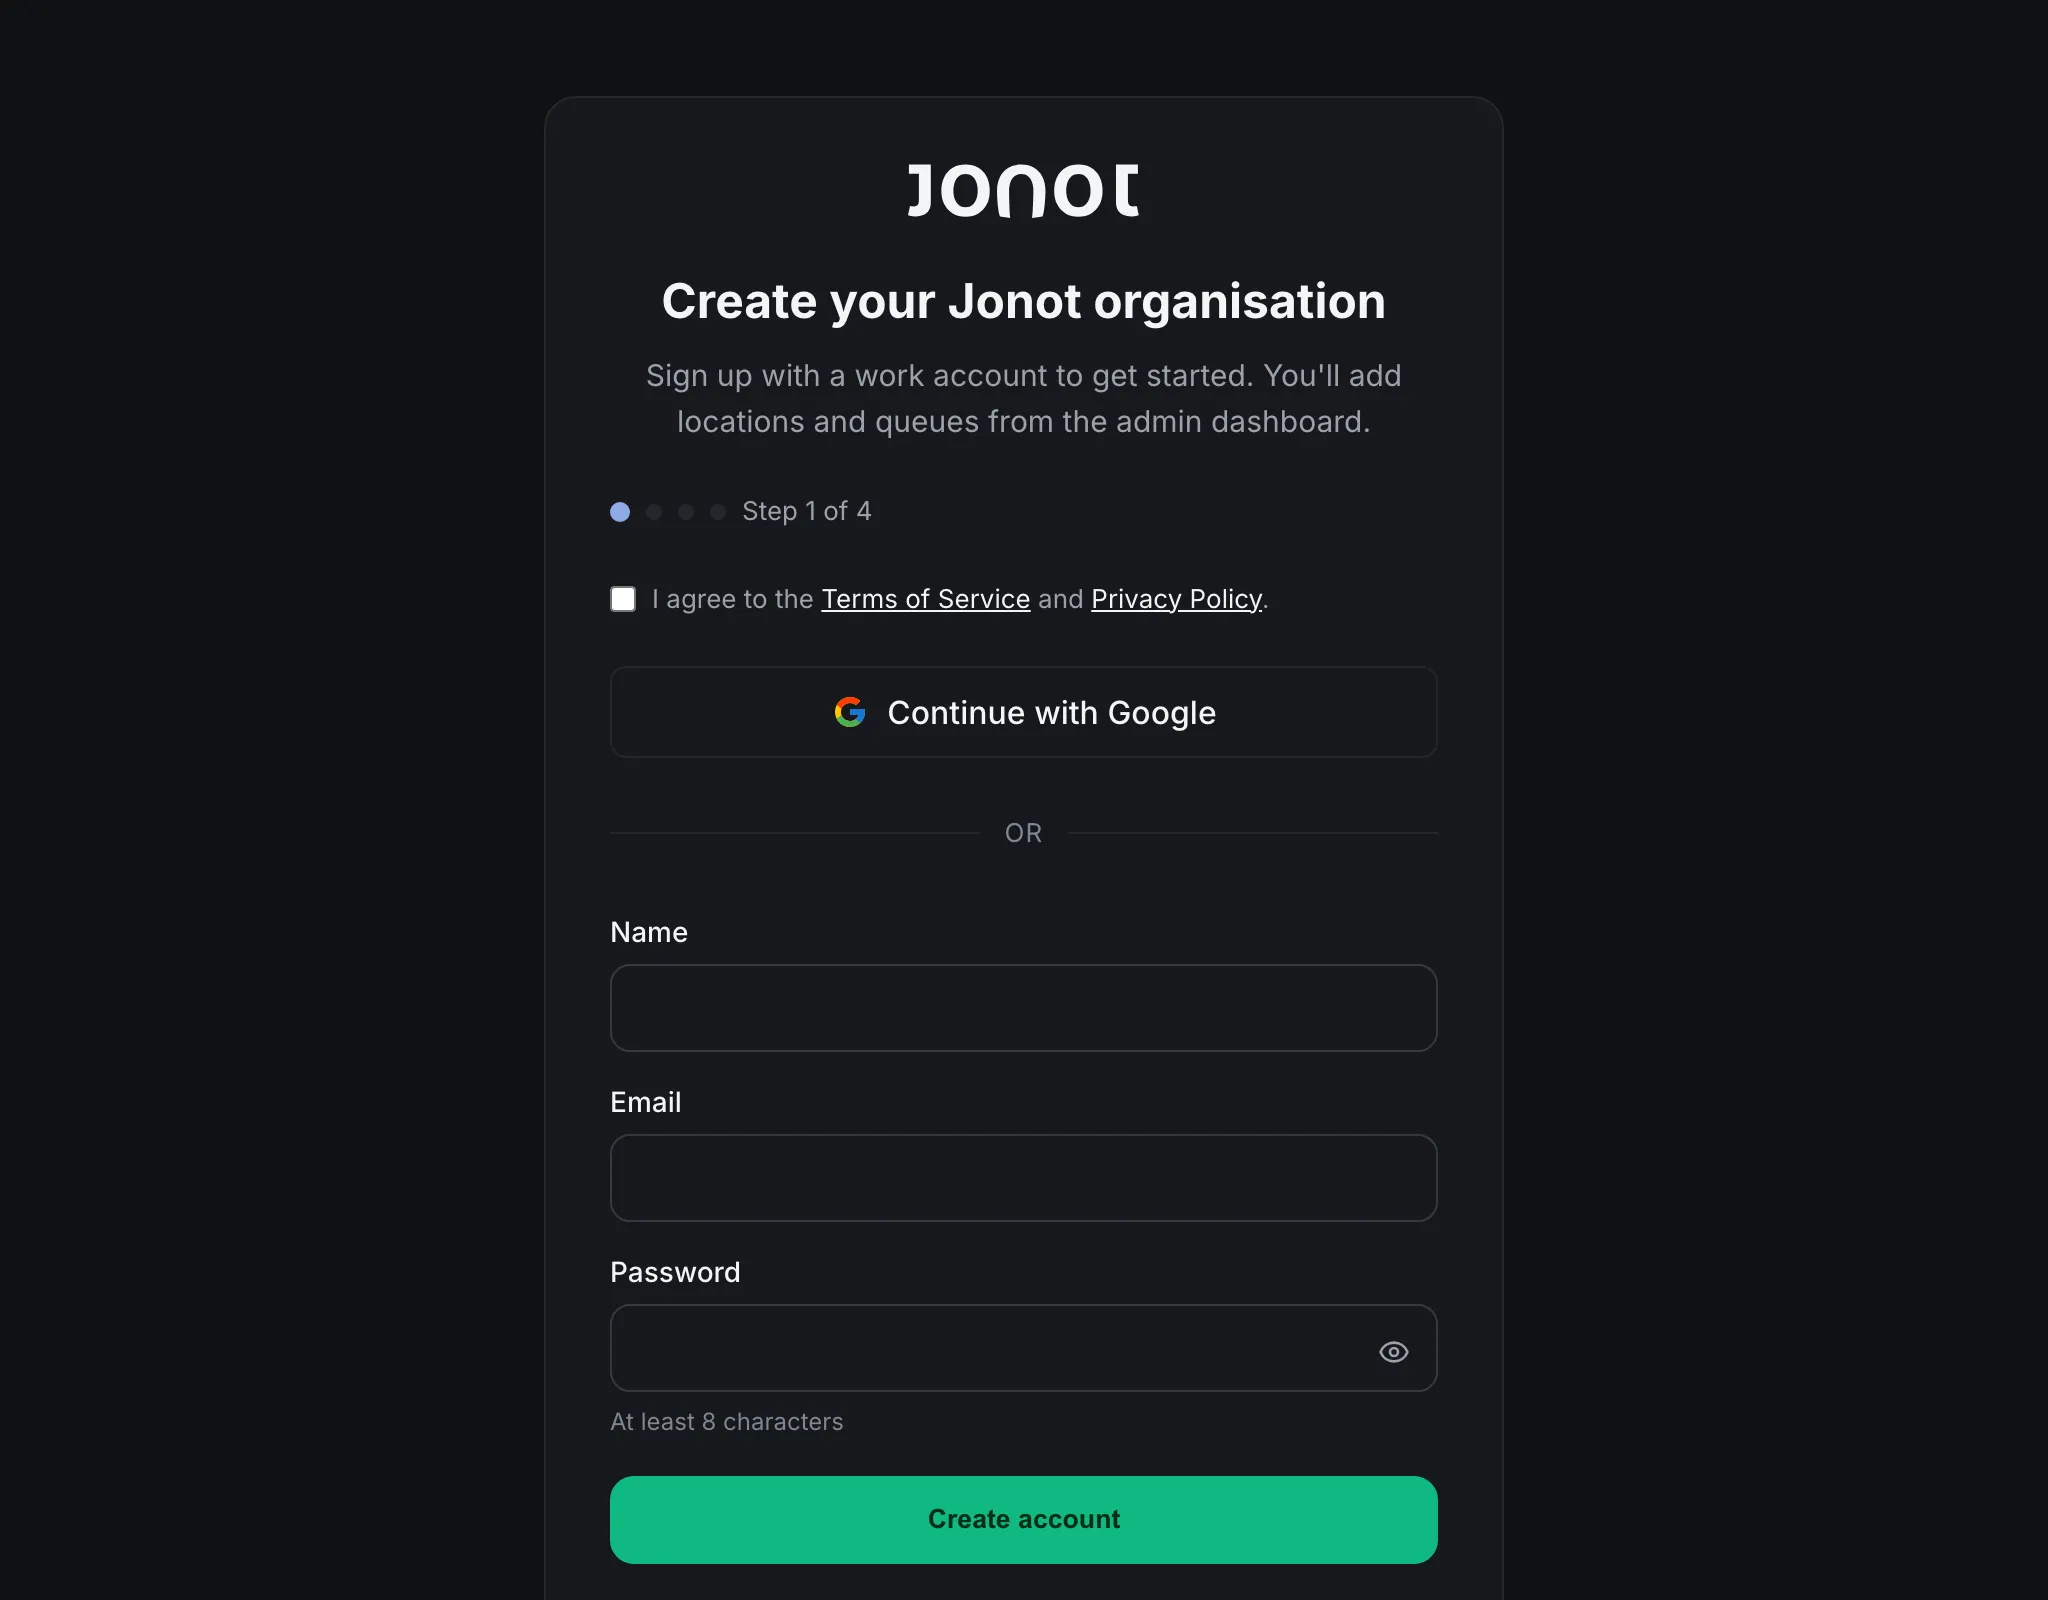
Jonot supports two ways to create an account:
- Email and password — enter your email address and choose a password. Jonot then sends a confirmation email. Select the link in it to continue with the next step. If the email does not arrive, check your spam folder and select Resend email, or select Use a different email to start over with another address. Accounts created with Google skip this confirmation.
- Continue with Google — click the Google button and authenticate with your Google account. The wizard then opens the next step.
Both options create the same type of account. Choose the option you prefer.
By creating an account, you agree to the Terms of Service and Privacy Policy.
Step 2 — Organisation details
Section titled “Step 2 — Organisation details”
After you create your account, the Tell us about your organisation form opens. An organisation represents your business and contains its locations, queues, and devices.
Before you create the organisation, select the checkbox beside Terms of Service and Privacy Policy, then click Continue. This also applies when you already have an account.
What to fill in
Section titled “What to fill in”- Organisation name (required) — the display name for your business, such as “Acme Clinic”.
- URL slug (optional) — auto-generated from the organisation name if left blank. See About slugs below.
- Industry (optional) — choose the option that best describes your business. Choose Other if none of the listed industries apply. Jonot uses this information to provide defaults for your industry.
- Estimated monthly customers (optional) — helps Jonot recommend the right plan.
About slugs
Section titled “About slugs”The slug becomes part of every customer-facing URL for your organisation:
https://customer.jonot.io/{org-slug}/{location-slug}/{queue-slug}/It must be 3–40 characters and can contain only lowercase letters (a–z), numbers (0–9), and hyphens (-). It cannot start or end with a hyphen or contain consecutive hyphens. You can change it later in the organisation settings. However, changing it breaks printed QR posters and previously shared join links.
Step 3 — Choose a plan and complete checkout
Section titled “Step 3 — Choose a plan and complete checkout”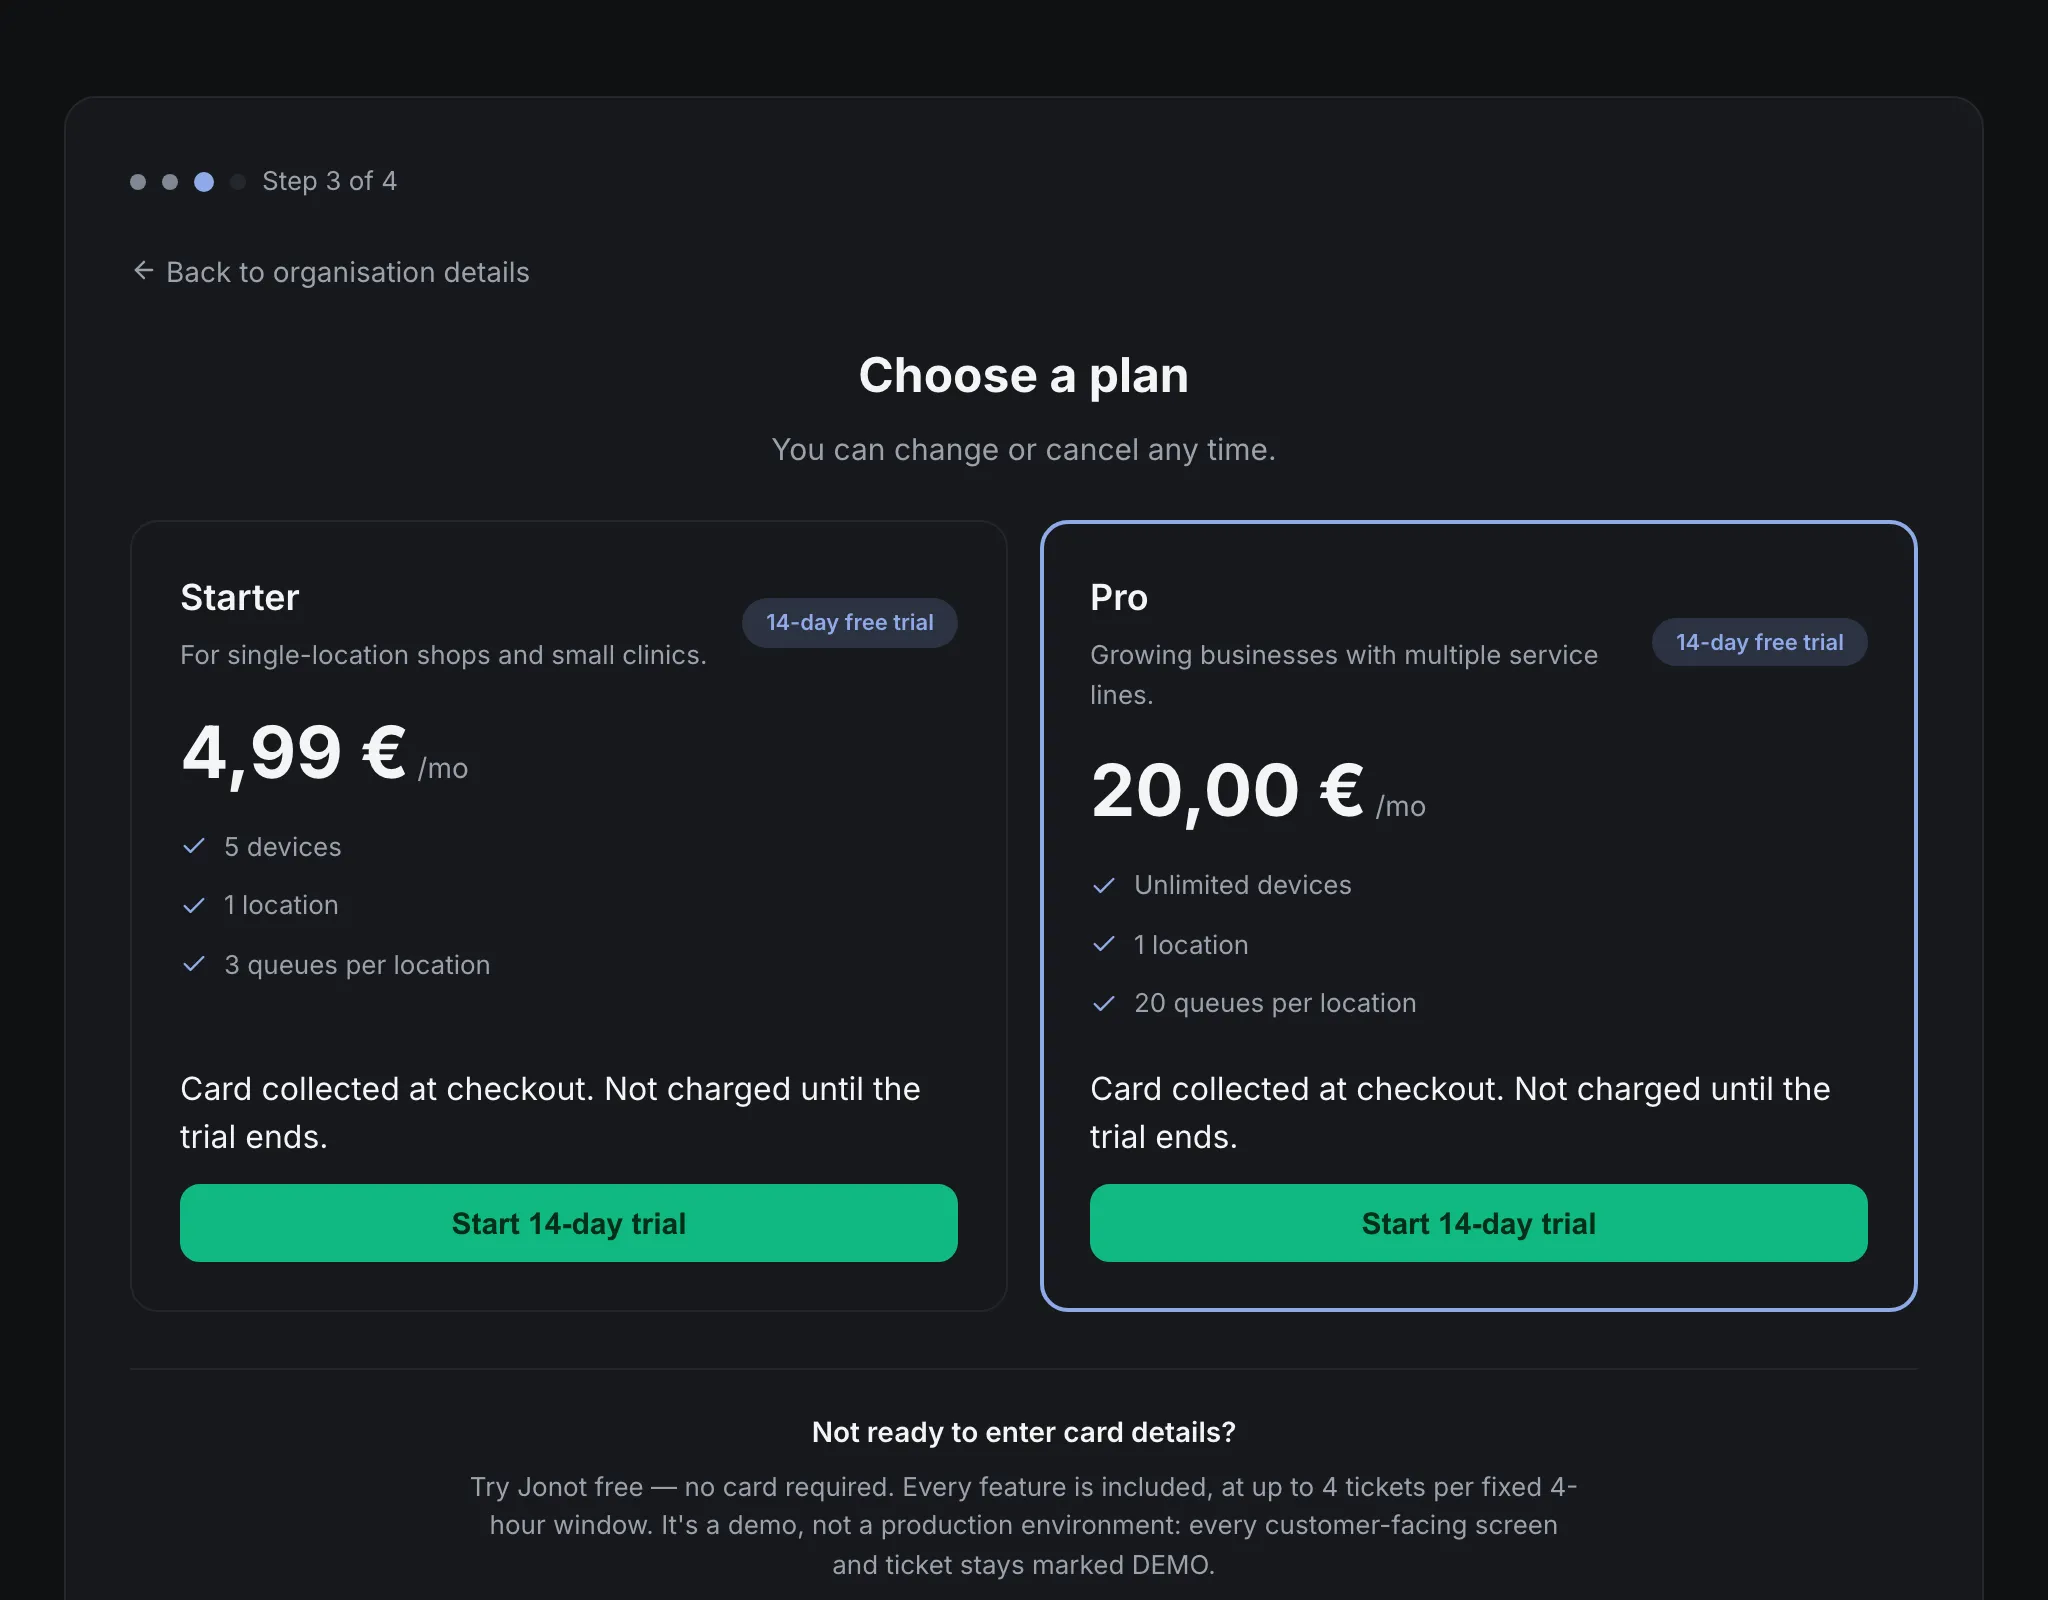
After you submit your organisation details, the Choose a plan step opens. Jonot offers two plans. Choose the plan that meets your business needs.
Starter
Section titled “Starter”Starter is for businesses with one location. It includes all core queue management features for one physical venue. The plan includes a free trial. You must provide a payment card at checkout, but Jonot does not charge you until the trial ends.
Pro is the most popular plan. It is for businesses that run several service lines or need more advanced features. Pro includes the same free trial terms as Starter: you must provide a payment card, but Jonot does not charge you until the trial ends.
Try a demo instead
Section titled “Try a demo instead”Below the plan cards, the Start a 14-day demo link starts a demo without a payment card. Each email address can start one demo, and Jonot refuses disposable email domains. See Demo accounts for the limits and the term.
Completing checkout
Section titled “Completing checkout”Click Start 14-day trial on the card for your chosen plan. Checkout opens over the same page, so you stay in the wizard. Enter your payment details. After the payment method is saved, the fourth and final step opens. This confirmation screen confirms that your account is ready and explains what to do next. Click Go to Admin Dashboard to open admin.jonot.io and continue with Phase B. If you are using a shared computer, you can choose Sign out instead.
Your trial starts when you complete checkout. You can cancel before the trial ends without being charged. See Billing and Plans for details.
If you close checkout without paying
Section titled “If you close checkout without paying”If you close checkout without paying, the wizard offers a demo (Want to try it first?) or a way back to the plans (Back to plans). Your organisation exists already. If you return to the wizard later, it opens You already have an organisation with a Go to billing button instead of the plan step. Choose a plan on the billing page in the admin dashboard, which also shows a banner for an organisation without a plan.
If your organisation already has a subscription that ended
Section titled “If your organisation already has a subscription that ended”The wizard cannot start a new checkout for an organisation whose subscription ended, for example after a cancellation, an expired trial, or a failed payment. It opens the same You already have an organisation screen. To restore the subscription, see Reactivate. If you complete checkout but the subscription is not active afterwards, the wizard shows Your subscription isn’t active. Check your payment and plan status in the billing section of the admin dashboard.
Forgotten password
Section titled “Forgotten password”If you created your account with email and password and cannot sign in, use the Forgot password? link on the admin login page (admin.jonot.io):
- Click Forgot password? below the sign-in form.
- Enter your email address and click Send reset link.
- Check your inbox for an email from
no-reply@jonot.io. Click the reset link in the email. The admin app opens a form for your new password. - Enter and confirm your new password, then click Reset password.
The reset link works once and expires after a short time. If you do not receive the email within a few minutes, check your spam folder. If the email address is not registered, you still see the “if this email exists…” confirmation. This message prevents other people from checking whether an address is registered.
Accounts created with Google do not have a password and cannot use the password reset process. Sign in with Continue with Google instead.