
Pair a Desk Terminal
The desk is the staff-facing interface used to call customers, mark them as served, or skip them.
Jonot provides an Android desk app for fixed service-counter tablets and a desktop desk client for macOS, Windows, and Linux. Both show the same desk screen. They can also switch automatically to a host at your venue during an internet outage. A browser cannot do this. See Install Jonot for download links. Pairing works the same way in every one of them.
Pairing steps
Section titled “Pairing steps”Pairing uses two devices. A code appears on the desk screen. You enter the code in Admin to activate the desk.
Step 1 — find the code on the desk device
Section titled “Step 1 — find the code on the desk device”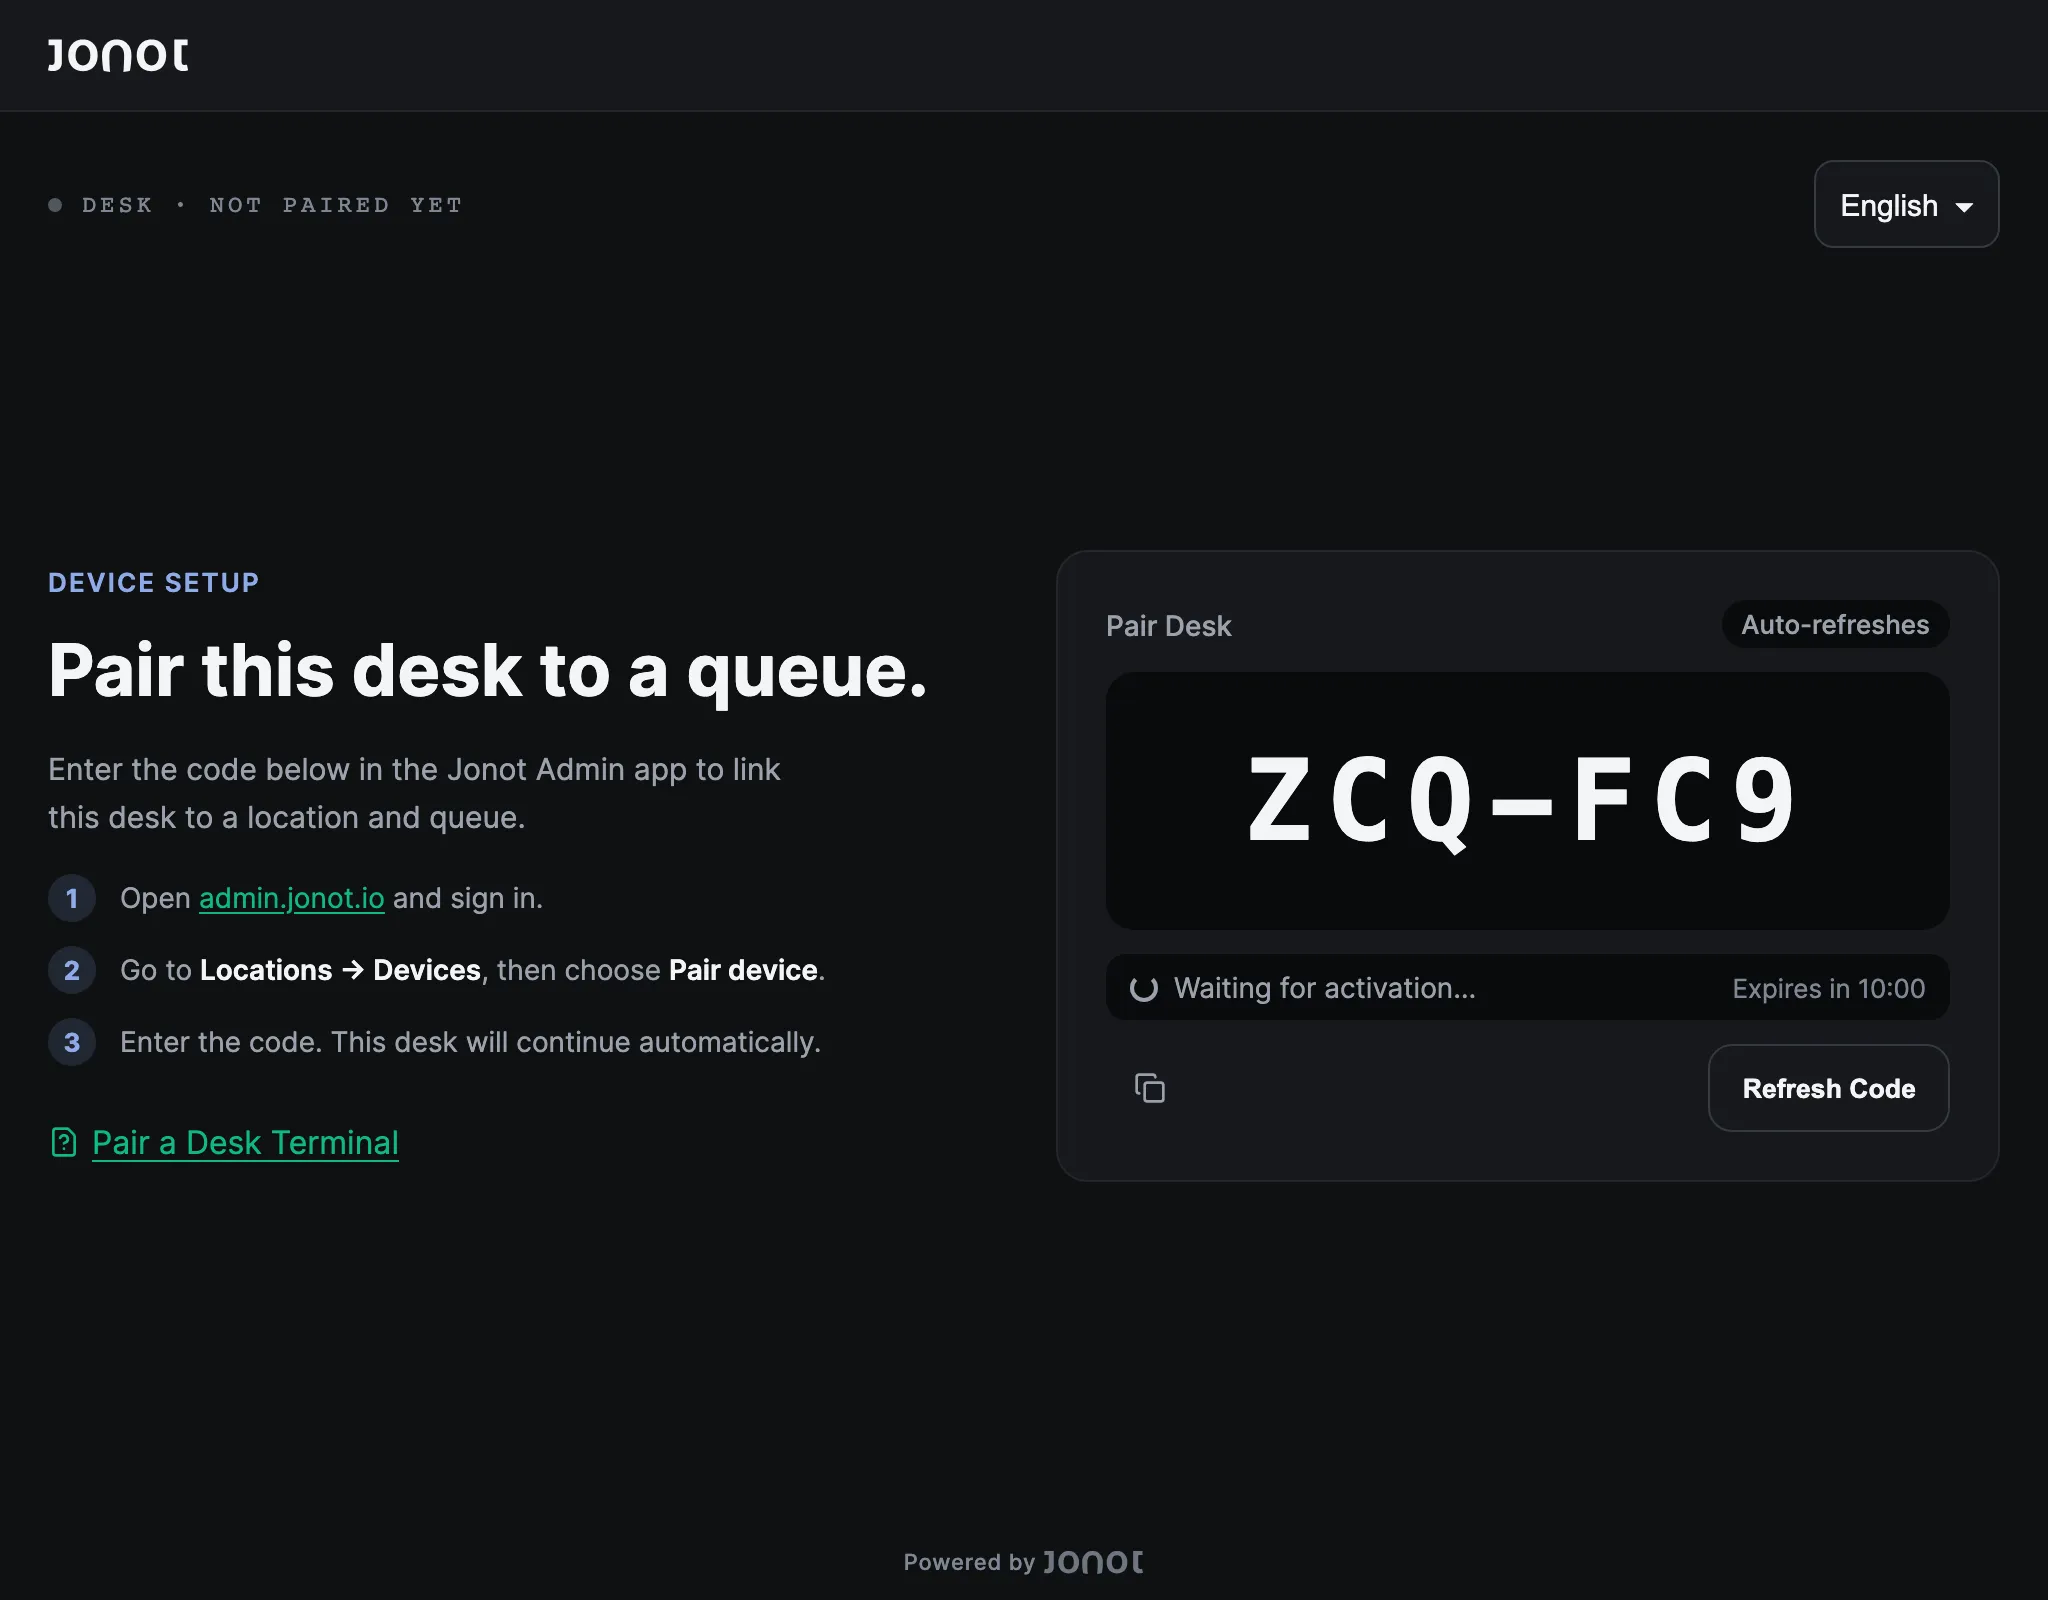
Recommended: dedicated desk app
Section titled “Recommended: dedicated desk app”- On the tablet that will stay at the service counter, install and open the Jonot Desk app — get it on Google Play (recommended), or download the APK directly for on-site deployments or deployments managed with mobile device management (MDM) when Google Play is not available. On a desktop or laptop, install the desktop desk client instead.
- Open Pair this device → if the pairing screen is not shown automatically.
- A 7-character pairing code, such as
K7M-4PQ, appears on the screen. The code is valid for 10 minutes.
Alternative: browser-based desk
Section titled “Alternative: browser-based desk”- On the staff computer or tablet, open
https://desk.jonot.io/pair/in a browser. - The same 7-character pairing code appears and is valid for 10 minutes.
Keep the screen visible. You will type this code into admin in the next step.
Step 2 — activate the device in admin
Section titled “Step 2 — activate the device in admin”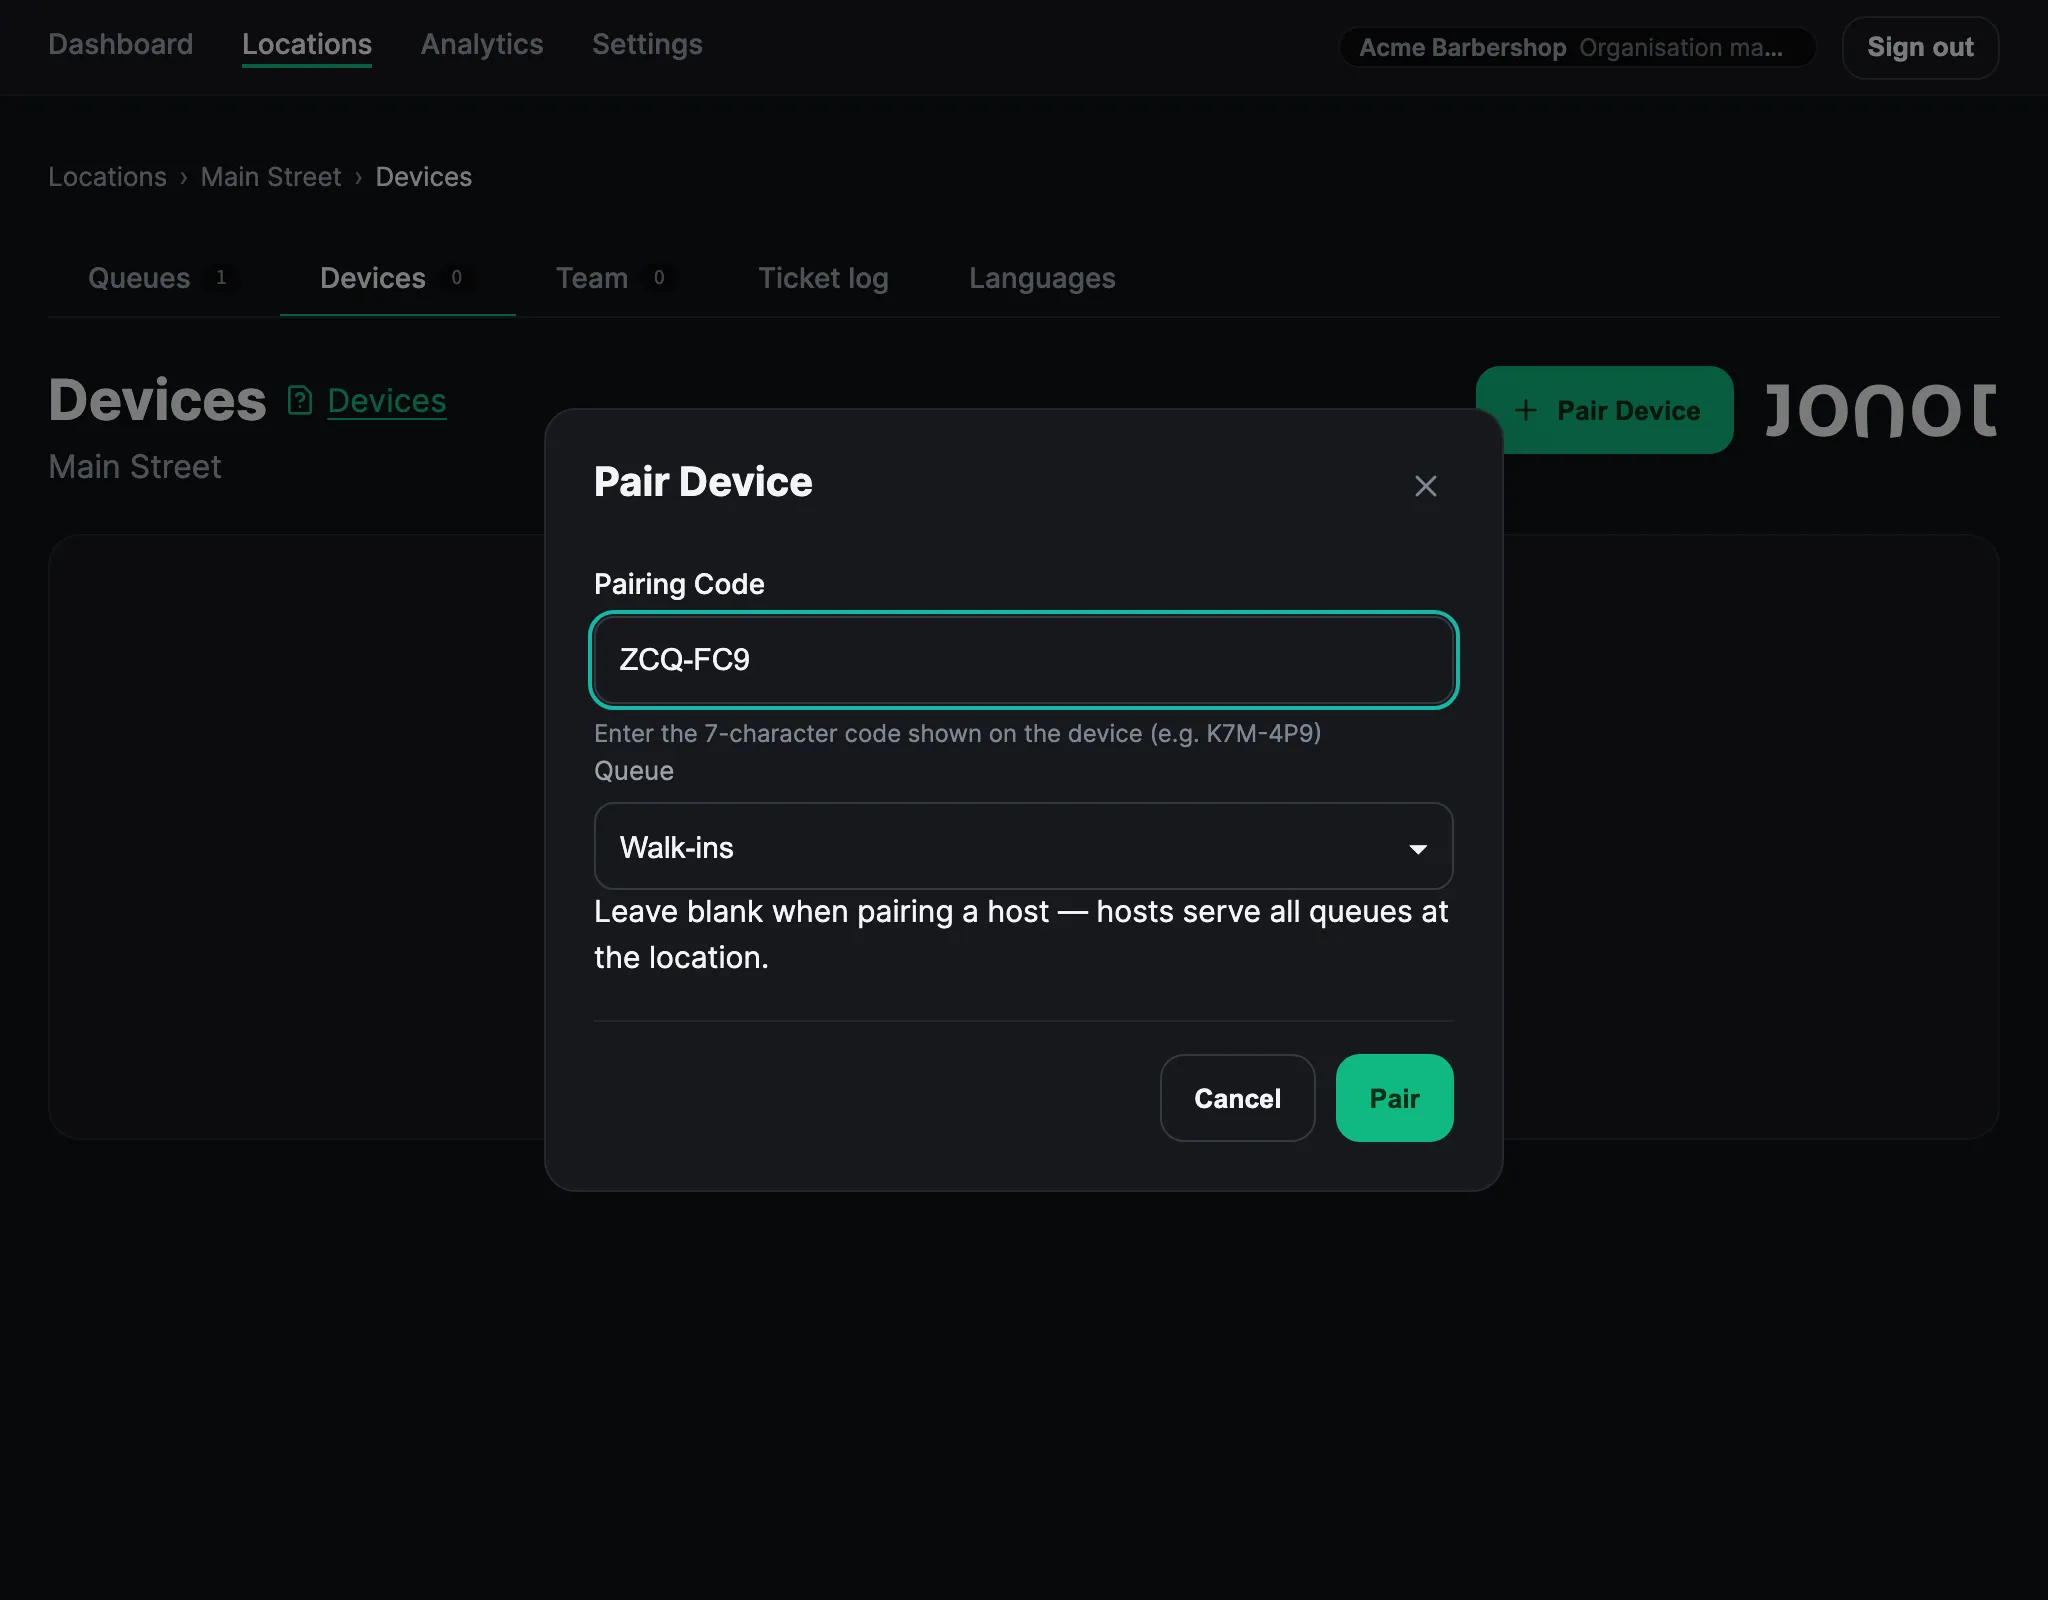
- In admin, open your location and go to the Devices tab.
- Click Pair device. The code identifies the device as a desk, so you do not need to select a device type.
- Choose the initial queue this desk will serve. You can assign more queues after pairing.
- You can give the desk a name, such as “Desk 1” or “Counter A”. This name appears on the display when a ticket is called.
- Enter the 7-character code shown on the desk screen.
- Click Pair. The desk detects activation and opens the queue management view in the app or browser.
If the code expires before you enter it in admin, return to the desk pairing screen and request a new one.
Assign additional queues
Section titled “Assign additional queues”A paired desk can serve one to five queues in its location. Keep one queue assigned for the standard desk view, or assign two to five queues to open the multi-queue view.
- On the desk, open Settings.
- In Active queues, select one to five queues.
- Click Save.
The desk applies the new assignment immediately. Staff can repeat these steps whenever the desk’s queue coverage changes. In multi-queue view, the desk shows one panel for each assigned queue and includes Call next (any queue).
No staff login required
Section titled “No staff login required”The desk authenticates with a device credential, not a personal Jonot account. Staff do not need to sign up or sign in. Pairing the device gives anyone who uses that computer access to the shared desk session.
To revoke desk access, go to Admin → Devices and remove the device. Jonot signs the desk out the next time it connects.