
Pair a Display
The display is a TV or monitor in your waiting area. It shows the ticket numbers being called and the desk for each call. It also shows how many customers are waiting and previews the next numbers. The display updates in real time. It announces called numbers with a sound and a flash across the whole screen.
Jonot provides an Android display app for wall-mounted tablets and TVs and a desktop display client for macOS, Windows, and Linux. Both show the same display screen. On Android, macOS, and Windows, these apps start automatically, keep the screen awake, and update themselves. Google Play installs updates on Android. The Linux desktop client does not provide these extra features. See Install Jonot for download links. Pairing works the same way in every one of them.
Pairing steps
Section titled “Pairing steps”Pairing uses two devices. A code appears on the display screen. You enter the code in Admin to activate the display.
Step 1 — find the code on the TV or monitor
Section titled “Step 1 — find the code on the TV or monitor”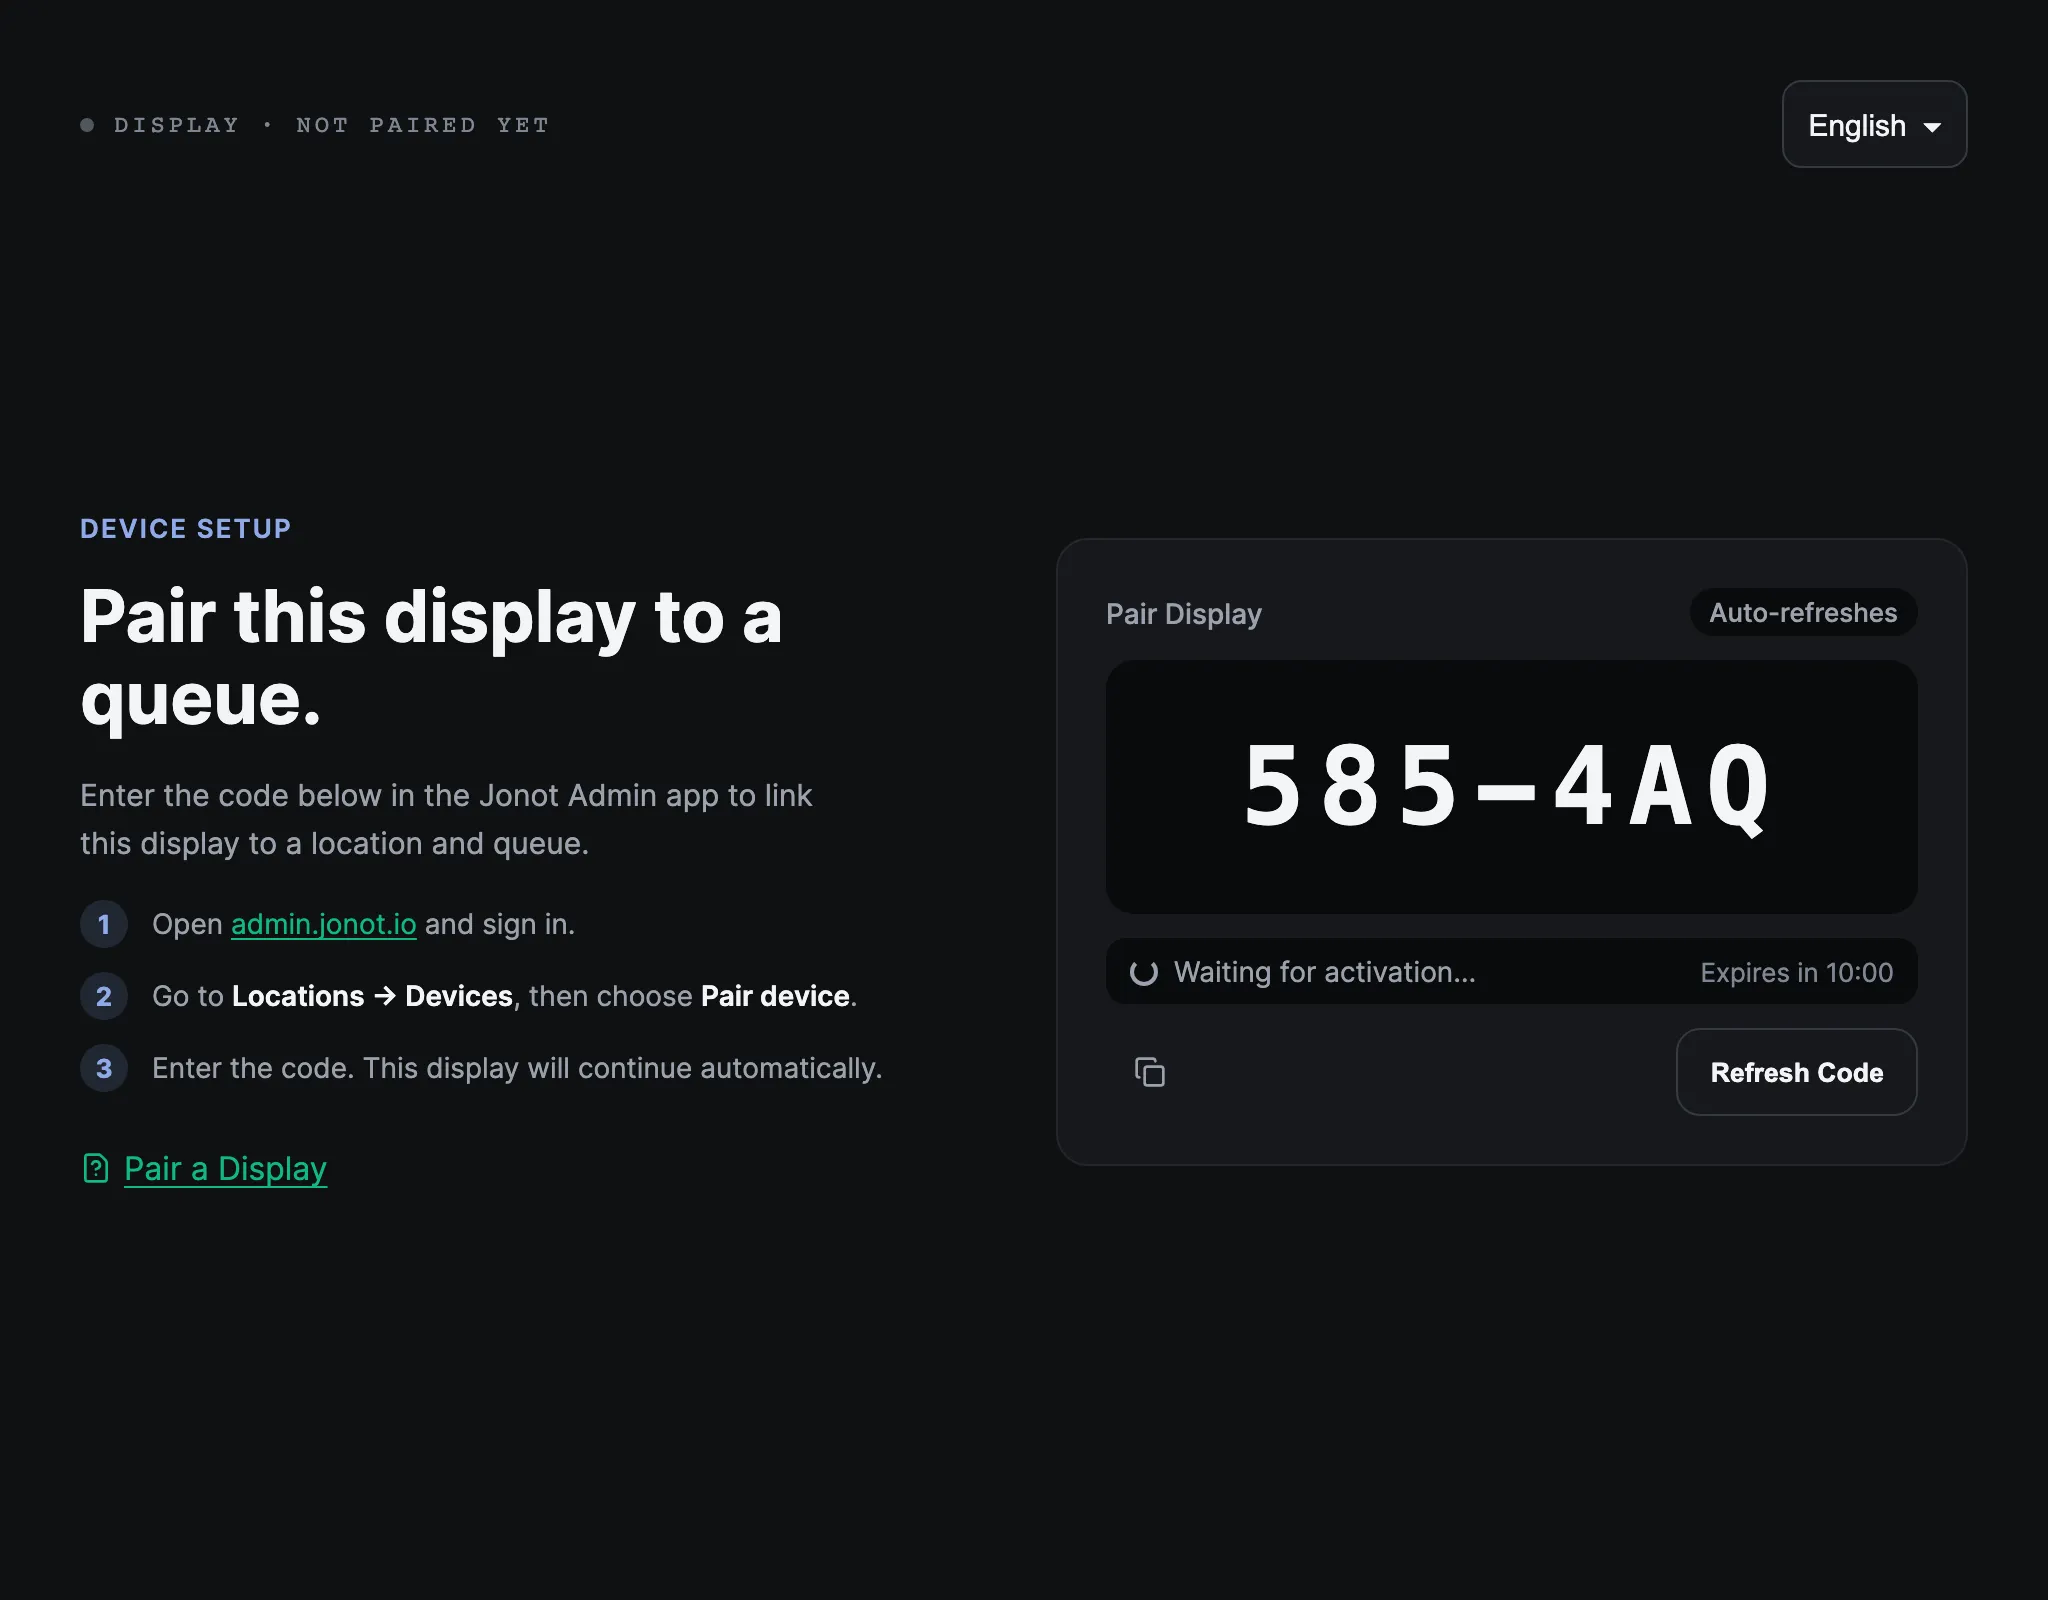
Recommended: dedicated display app
Section titled “Recommended: dedicated display app”- On the tablet or TV that will show the queue, install and open the Jonot Display app — get it on Google Play (recommended), or download the APK directly for on-site deployments or deployments managed with mobile device management (MDM) when Google Play is not available. On a desktop or laptop, install the desktop display client instead.
- Open Pair this device → if the pairing screen is not shown automatically.
- A 7-character pairing code, such as
K7M-4PQ, appears on the screen. The code is valid for 10 minutes.
Alternative: browser-based display
Section titled “Alternative: browser-based display”- On the device connected to the display screen, open
https://display.jonot.io/pair/in a browser. - A 7-character pairing code, such as
K7M-4PQ, appears on the screen. The code is valid for 10 minutes.
Keep the screen visible. You will type this code into admin in the next step.
Step 2 — activate the device in admin
Section titled “Step 2 — activate the device in admin”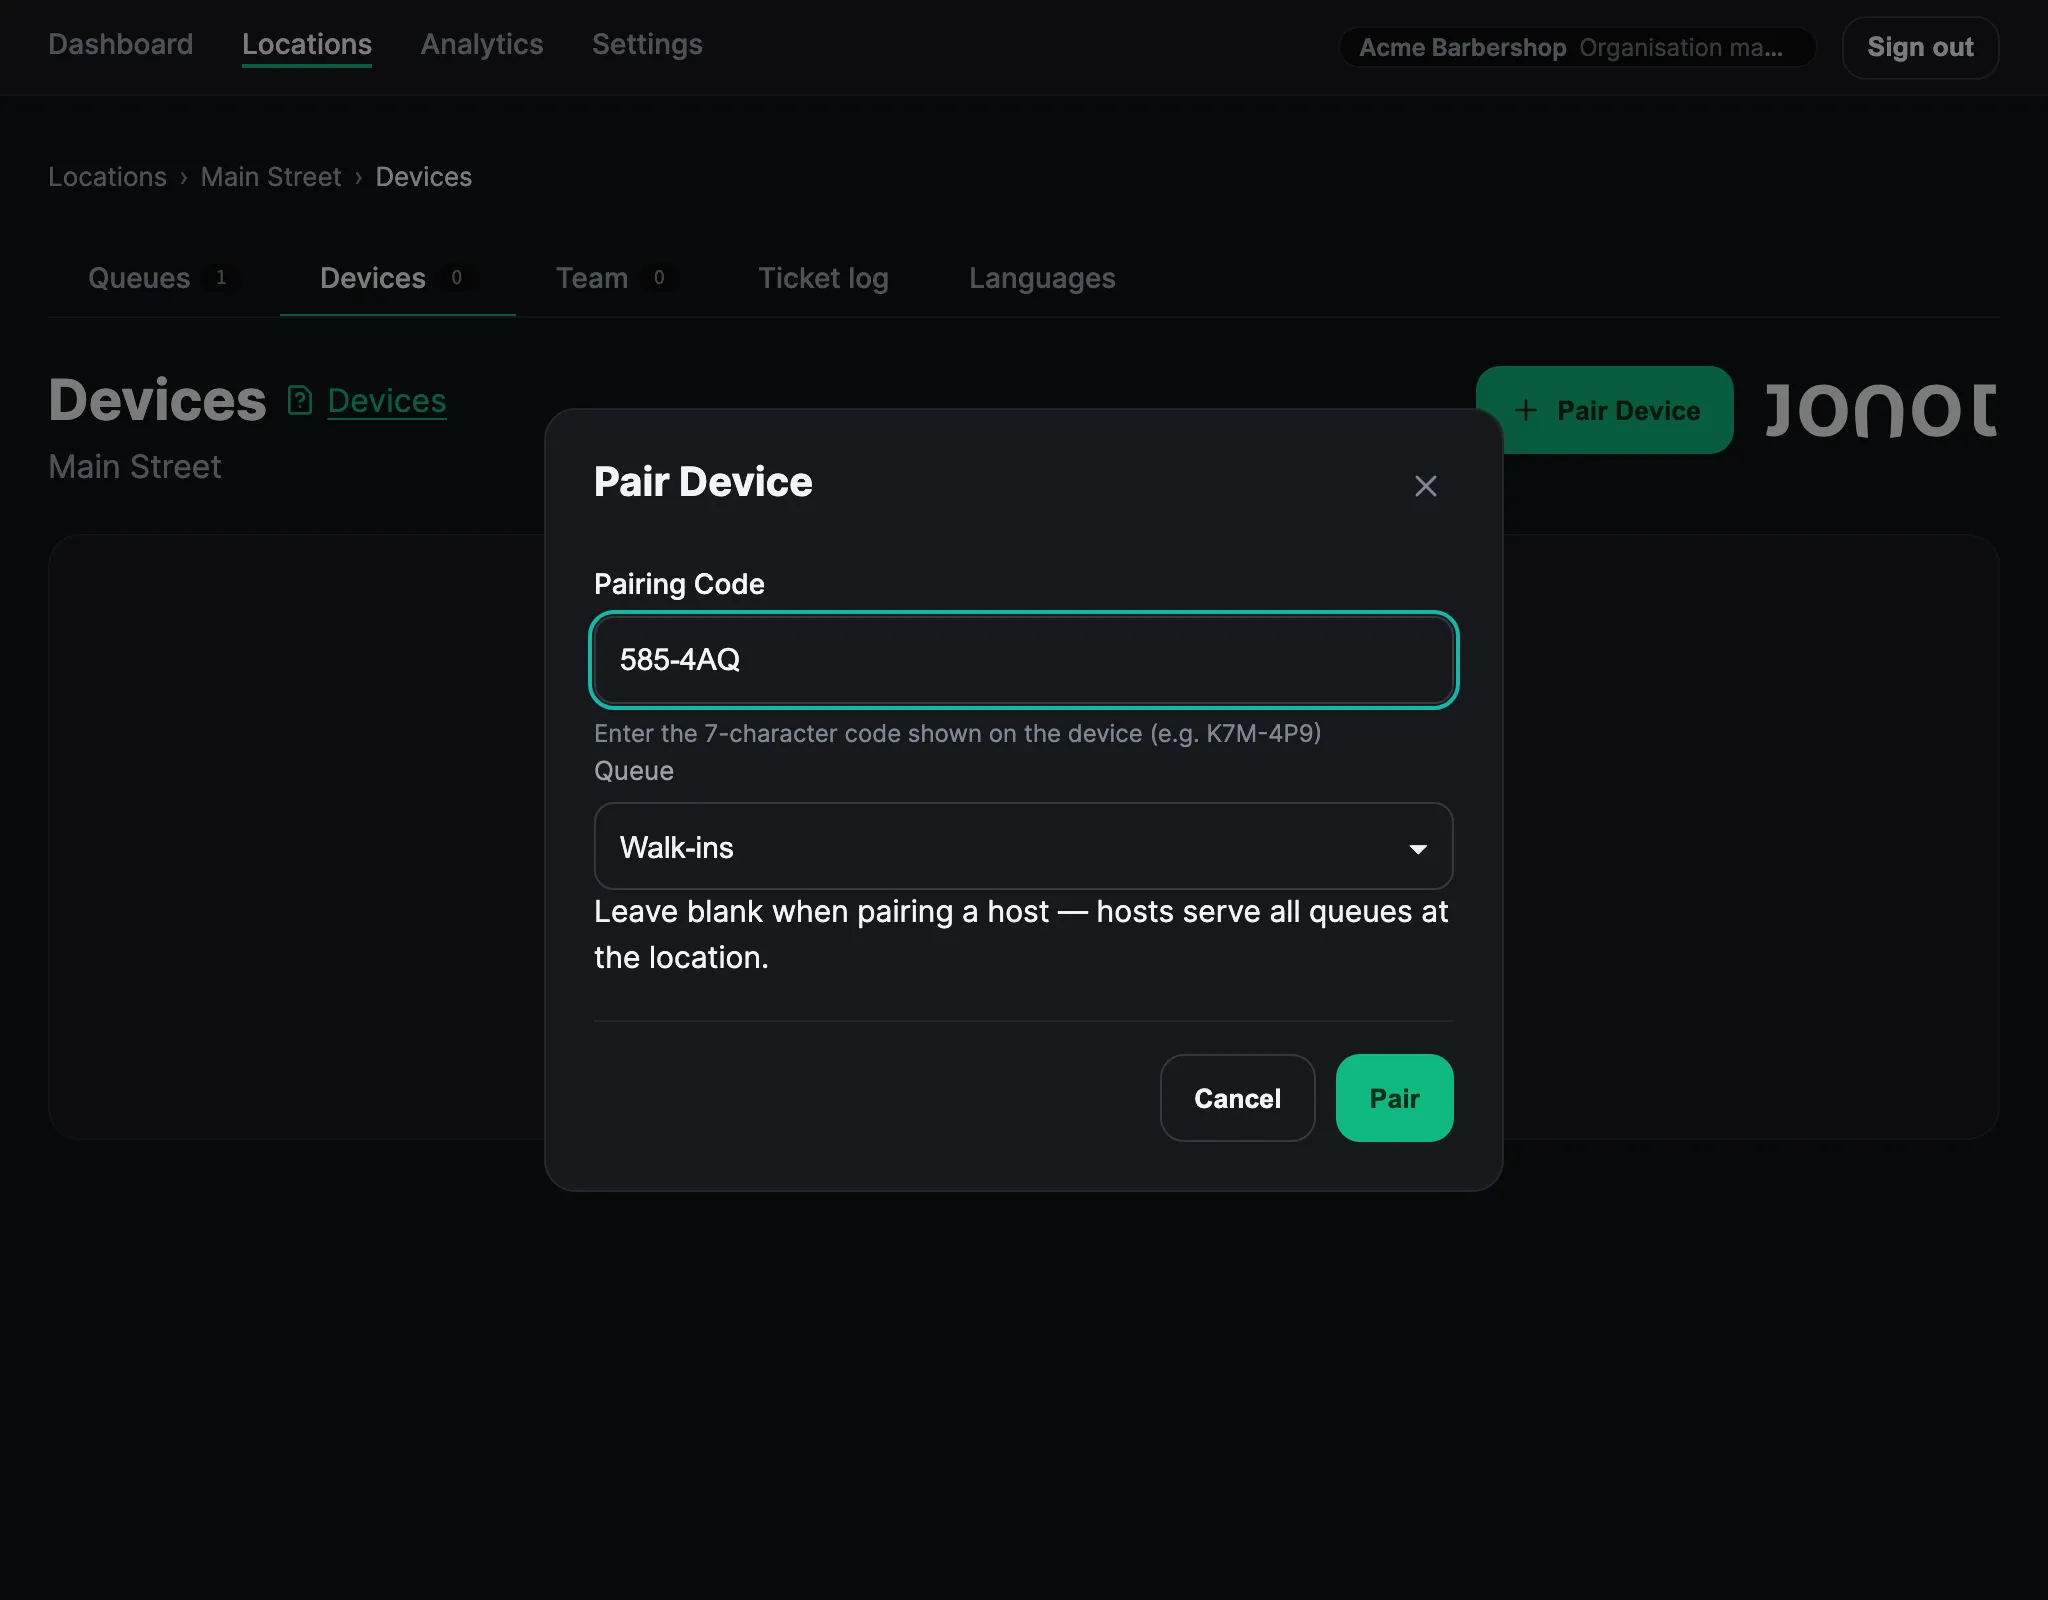
- In admin, open your location and go to the Devices tab.
- Click Pair device. The code identifies the device as a display, so you do not need to select a device type.
- Assign the display to one or more queues (see Display assignment below).
- Enter the 7-character code shown on the display screen.
- Click Pair. The display detects activation and switches into the live queue view.
If the code expires before you enter it in admin, return to the display pairing screen and request a new one.
Display assignment
Section titled “Display assignment”You can configure a display in these ways:
- Single queue — shows calls for one queue. Use this option when each queue has its own screen.
- Multi-queue board — shows up to 5 queues next to each other on one live board. Each column updates separately. Paused queues show a paused badge. Use the checkboxes in the edit window to assign several queues.
- Location view (all desks) — the default; shows all active calls across the entire location. Use this option for one shared screen in the waiting area.
- Linked desk — links the display to one desk. When the desk is online, the display shows only that desk’s calls in a single-ticket view. If the desk stays offline for more than 2 minutes, the display changes to location view until the desk reconnects.
To change a display’s queue assignment or linked desk after pairing, open the Devices tab, click Edit on the display row, and adjust the queue checkboxes or the Linked desk selector.
Keep the display awake
Section titled “Keep the display awake”The Android display app and the desktop display client on macOS and Windows keep the screen awake automatically. You do not need to change the device settings. On Linux or in a browser tab, the device’s power settings control the screen. A web page cannot override them. Configure the device to stay awake and keep it connected to power so customers can see the queue:
- Android tablet or TV box — open Settings → Display and set the screen timeout to the longest option or Never, if available. If the device does not have a “Never” option, enable Developer options → Stay awake. This keeps the screen on while the device charges. Turn off the screen saver or “daydream” feature.
- Smart TV — turn off the screen saver, eco / power-saving timer, and auto power-off in the TV settings. The location of these settings depends on the manufacturer. They are often under Settings → Power or Settings → General.
- Desktop or laptop browser — turn off system sleep and screen blanking in the operating system’s power settings. The desktop lockdown guide gives instructions for each operating system. Its sleep and screen-blanking steps also apply to displays.
Always keep the display device connected to power. Most devices sleep or reduce performance on battery, regardless of the screen-timeout setting.